别用 VMware 了,这款虚拟机简单、轻量、好用还免费…
1
对于从事IT技术行业的我们,大家对VMware虚拟机应该都比较熟悉,平时自己搭个学习、测试、开发环境啥的,还真离不开它。
VMware 虚拟机的功能非常强大,比如:启动快速,运行程序更加方便快捷;虚拟系统只能模拟和现有操作系统相同的环境,而虚拟机则可以模拟出其他种类的操作系统;而且虚拟机需要模拟底层的硬件指令,所以在应用程序运行速度上比虚拟系统慢得多。
VMware 虚拟机确实是真的好用,但是它是收费的,而且费用还不便宜;再者,VMware使用起来相对麻烦,对于新手来说,不是很友好,我刚刚接触虚拟机的时候,就是用的VMware,被挖了不少坑,从心理上对VMware的使用感受就一直不太好;今天再大家介绍一款好用、轻量级的虚拟机产品 Multipass(免费开源)。
Multipass 简介
Multipass是一款非常轻量级的虚拟机命令管理工具,它支持 Linux、Windows 和 macO S等多平台运行环境。
Multipass 是由 Ubuntu 运营公司 Canonical 所推出的开源项目。在不同的操作系统上,使用的是不同的虚拟化技术,可以使用最小的资源开销来快速创建你所需要的虚拟机。
对于使用 Linux系统的程序员来讲,Multipass 它还提供一个命令行界面来管理你的Linux实例,非常的方便、易操作与管理。
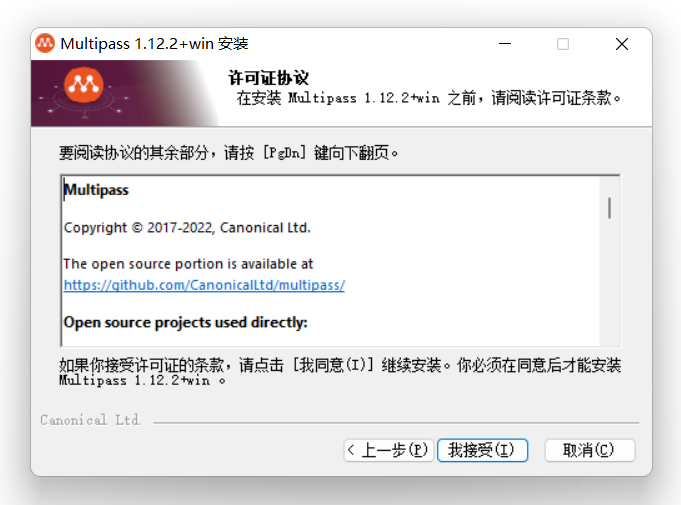
Multipass 安装
在官方网站:https://multipass.run/install 选择对应该的系统版本下载即可:

我这里选择的Windows 版本
安装之后,查看自己安装的版本
<span style="outline: 0px; color: #4078f2; line-height: 26px;">$</span><span style="outline: 0px; line-height: 26px;"> multipass version </span><br style="outline: 0px;" />Multipass使用
创建Ubuntu虚拟机
首先查看可以下载使用的 Ubuntu 镜像
<span style="outline: 0px; color: #4078f2; line-height: 26px;">$</span><span style="outline: 0px; line-height: 26px;"> multipass find </span><br style="outline: 0px;" />运行成功后,可以看到下面的这些镜像列表,包含各种版本的。
Image Aliases Version Description <br style="outline: 0px;" />snapcraft:core18 20201111 Snapcraft builder <span style="outline: 0px; color: #a626a4; line-height: 26px;">for</span> Core 18 <br style="outline: 0px;" />snapcraft:core20 20201111 Snapcraft builder <span style="outline: 0px; color: #a626a4; line-height: 26px;">for</span> Core 20 <br style="outline: 0px;" />core core16 20200818 Ubuntu Core 16 <br style="outline: 0px;" />core18 20200812 Ubuntu Core 18 <br style="outline: 0px;" />16.04 xenial 20210128 Ubuntu 16.04 LTS <br style="outline: 0px;" />18.04 bionic 20210129 Ubuntu 18.04 LTS <br style="outline: 0px;" />20.04 focal,lts 20210223 Ubuntu 20.04 LTS <br style="outline: 0px;" />20.10 groovy 20210209 Ubuntu 20.10 <br style="outline: 0px;" />appliance:adguard-home 20200812 Ubuntu AdGuard Home Appliance <br style="outline: 0px;" />appliance:mosquitto 20200812 Ubuntu Mosquitto Appliance <br style="outline: 0px;" />appliance:nextcloud 20200812 Ubuntu Nextcloud Appliance <br style="outline: 0px;" />appliance:openhab 20200812 Ubuntu openHAB Home Appliance <br style="outline: 0px;" />appliance:plexmediaserver 20200812 Ubuntu Plex Media Server Appliance <br style="outline: 0px;" />新建一个容器
<span style="outline: 0px; color: #4078f2; line-height: 26px;">$</span><span style="outline: 0px; line-height: 26px;"> multipass launch --name dg </span><br style="outline: 0px;" />Launched: dg <br style="outline: 0px;" />然后下载最新版的 Ubuntu 镜像,之后我们就可以直接使用了。
<span style="outline: 0px; color: #4078f2; line-height: 26px;">$</span><span style="outline: 0px; line-height: 26px;"> multipass <span style="outline: 0px; color: #c18401; line-height: 26px;">exec</span> dg -- lsb_release -d </span><br style="outline: 0px;" />Description: Ubuntu 18.04.4 LTS <br style="outline: 0px;" />操作虚拟机
查看虚拟机列表
虚拟机创建完成后,查看虚拟机列表。
Name State IPv4 Image <br style="outline: 0px;" />dg Running 192.168.24.5 Ubuntu 18.04 LTS <br style="outline: 0px;" />现在有一台 Ubuntu 18.04 版本的虚拟机在运行,对应的 IP 地址是:192.168.24.5 。
查看虚拟机信息
通过命令你可以查看当前运行的虚拟机具体信息。
<span style="outline: 0px; color: #4078f2; line-height: 26px;">$</span><span style="outline: 0px; line-height: 26px;"> multipass info --all </span><br style="outline: 0px;" /> <br style="outline: 0px;" />Name: dg <br style="outline: 0px;" />State: Running <br style="outline: 0px;" />IPv4: 192.168.24.5 <br style="outline: 0px;" />Release: Ubuntu 18.04.4 LTS <br style="outline: 0px;" />Image hash: fe3030933742 (Ubuntu 18.04 LTS) <br style="outline: 0px;" />Load: 0.00 0.00 0.00 <br style="outline: 0px;" />Disk usage: 1.5G out of 4.7G <br style="outline: 0px;" />Memory usage: 112.1M out of 985.7M <br style="outline: 0px;" />进入虚拟机
使用下面的命令查看虚拟机的系统配置信息、内存、磁盘等的使用情况。
<span style="outline: 0px; color: #4078f2; line-height: 26px;">$</span><span style="outline: 0px; line-height: 26px;"> multipass shell dg </span><br style="outline: 0px;" />如果你不想进入系统内部,也可以通过上述提到的 multipass exce 命令,来操作 Ubuntu 系统。
暂停/重启虚拟机
<span style="outline: 0px; color: #4078f2; line-height: 26px;">#</span><span style="outline: 0px; line-height: 26px;"> 暂停 </span><br style="outline: 0px;" /><span style="outline: 0px; color: #4078f2; line-height: 26px;">$</span><span style="outline: 0px; line-height: 26px;"> multipass stop dg </span><br style="outline: 0px;" /><span style="outline: 0px; color: #4078f2; line-height: 26px;">#</span><span style="outline: 0px; line-height: 26px;"> 启动 </span><br style="outline: 0px;" /><span style="outline: 0px; color: #4078f2; line-height: 26px;">$</span><span style="outline: 0px; line-height: 26px;"> multipass start dg </span><br style="outline: 0px;" />删除/释放虚拟机
使用 delete 命令 删除虚拟机之后,该虚拟机实际上还是存在了,想要彻底删除则需要释放虚拟机。
<span style="outline: 0px; color: #4078f2; line-height: 26px;">#</span><span style="outline: 0px; line-height: 26px;"> 删除 </span><br style="outline: 0px;" /><span style="outline: 0px; color: #4078f2; line-height: 26px;">$</span><span style="outline: 0px; line-height: 26px;"> multipass delete dg </span><br style="outline: 0px;" /><span style="outline: 0px; color: #4078f2; line-height: 26px;">#</span><span style="outline: 0px; line-height: 26px;"> 释放 </span><br style="outline: 0px;" /><span style="outline: 0px; color: #4078f2; line-height: 26px;">$</span><span style="outline: 0px; line-height: 26px;"> multipass purge dg </span><br style="outline: 0px;" />配置自动化
既要保持开发环境和线上环境一致,又要节省部署时间。我们可以使用 --cloud-init 对容器进行初始化配置:
<span style="outline: 0px; color: #4078f2; line-height: 26px;">$</span><span style="outline: 0px; line-height: 26px;"> multipass launch --name ubuntu --cloud-init config.yaml </span><br style="outline: 0px;" />config.yaml 是初始化配置文件,内容如下: <br style="outline: 0px;" /><span style="outline: 0px; color: #4078f2; line-height: 26px;"> <br style="outline: 0px;" />#</span><span style="outline: 0px; line-height: 26px;">cloud-config </span><br style="outline: 0px;" /> <br style="outline: 0px;" />runcmd: <br style="outline: 0px;" /> - curl -sL https://deb.nodesource.com/setup_12.x | sudo -E bash - <br style="outline: 0px;" /> - sudo apt-get install -y nodejs <br style="outline: 0px;" /> - wget https://releases.leanapp.cn/leancloud/lean-cli/releases/download/v0.21.0/lean-cli-x64.deb <br style="outline: 0px;" /> - sudo dpkg -i lean-cli-x64.deb <br style="outline: 0px;" />runcmd 可以指定容器首次启动时运行的命令。
总结
经过一段时间的使用,我认为这款工具确实是不错的!比如说我要搞点 linux 的小试验,通过 Multipass 几分钟就能搭起系统来测试。要测试小型数据库集群,也可以通过 Multipass 在本地快速搭建虚拟机集群,很不错!
唯一美中不足的是 Multipass 只能使用 Ubuntu 镜像,因为这款工具是由 Ubuntu 背后的 Canonical 公司开发开源的。
相关链接
官网:https://multipass.run/
文档:https://multipass.run/docs/